The serving tray described right here is designed to introduce the woodworker to bending a easy lamination. The challenge is small and simply modified to fit your personal style, but making it will provide you with the expertise you might want to apply the method to your personal work. It may be made totally with hand instruments and clamps, though a desk noticed and a band noticed or jigsaw are an incredible assist.
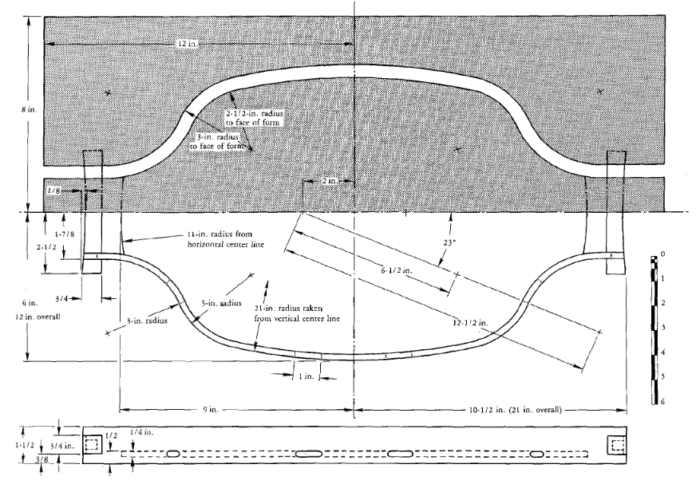
The tray is symmetrical and combines a plan view of the work with the shape format. The curve is constructed by swinging a sequence of arcs with the facilities and radii proven under. The essential factor in making any two-part kind is taking correct account of the total thickness of the laminates and kind liners. As a result of the curve of this challenge needn’t be completely exact, I’ve simplified the drawing course of by utilizing the surface line of the bent aspect because the face line of the concave half of the shape. This implies accounting for the whole thickness of the liners on the convex half of the shape. The place you want precision, you’d assemble the shape drawing by dividing the whole= thickness of the liners, half on either side of the piece itself. In any case, you want a full-size store drawing from which to make the shape.
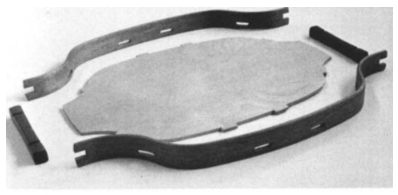
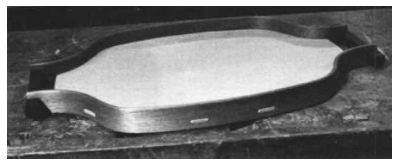
The underside panel of the tray, proven within the photograph on the high of the following web page, doesn’t lend itself to strong wooden building and is greatest made from good-quality plywood; I used 1/4-in. birch ply. The handles are of walnut and the perimeters are 4 laminations of 1/16-in. mahogany. This thickness turns the 3-in. radius nicely and the 4 layers are sufficient to reduce springback. Business veneers of 1/28 in., 1/30 in. or 1/40 in. may very well be used, however they don’t seem to be one of the best as a result of they usually purchase lumps and bumps throughout glue-up. If you happen to can’t discover thicker veneer, you may noticed it from an 8/4 board on the desk noticed, utilizing a hollow-ground planer blade or a carbide-tipped blade. Resawn inventory may require 5 thinner layers to provide the 1/4-in. thickness, as a result of it doesn’t at all times bend as simply as sliced veneer.
To line the shape I used 4 layers of 1/16-in. Formica, two on either side of the laminates, and the bundle totaled 1/2 in. You want to put together your inventory and kind liners and measure the bundle earlier than you may draw the road for the second half of the mildew. As an alternative of plastic laminate liners, you need to use an additional layer of veneers, springy metallic, or, for shallow bends, Masonite. But when the fabric is bondable bear in mind to insert paper or to wax the liners, or the entire enterprise may simply stick collectively.
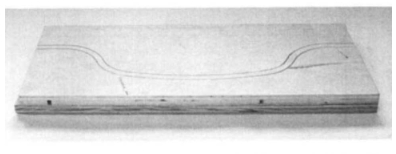
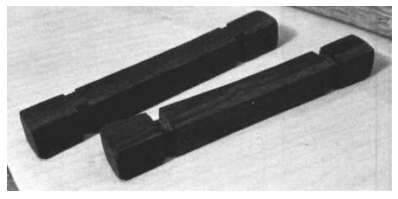
The shape proven above, bandsawn however with the waste left in place for the {photograph}, is made from two layers of three/4-in. veneer-core plywood. You could possibly use particle board, a stack of Masonite, and even 2×10 lumber. However it’s higher to keep away from strong wooden with a robust grain sample as a result of the band-saw blade will observe off the pencil line with variations within the density of the wooden. Make the shape as thick because the completed top of the bent sides, on this case 1-1/2 in., and make the inventory to be bent a bit oversize, maybe 1-3/4 in., to permit for misalignment in gluing.
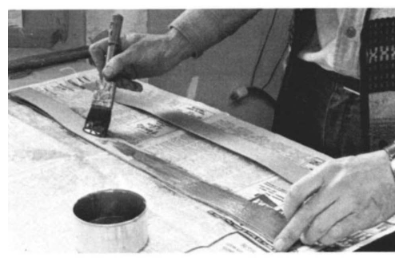
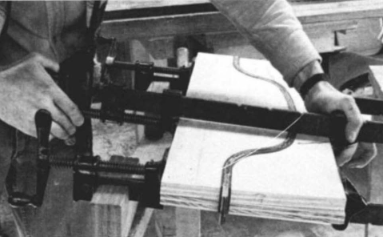
The glue I used was American Cyanamid’s Urac 185, which is great for laminating however sadly is offered solely in industrial barrels. You could possibly use Weldwood plastic resin glue or Cascamite, each of which resist water, and even Franklin’s Titebond (yellow glue) in the event you don’t thoughts a bit springback when the wooden is faraway from the shape. However keep away from whiteglue because it doesn’t resist water and it creeps. Organize the shape on the clamps as proven, and double-spread every glue line with brush or curler. With the inventory and liners in place, alternately tighten the middle clamp and the 2 finish clamps to convey the 2 halves collectively. Just a little glue ought to squeeze out all alongside every glue line. Faucet the shape with a hammer to maintain every part aligned in the identical airplane. When doing any form of laminating depart the clamps on in a single day, longer if the workshop is chilly.
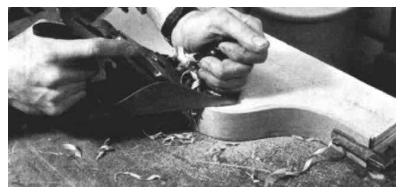
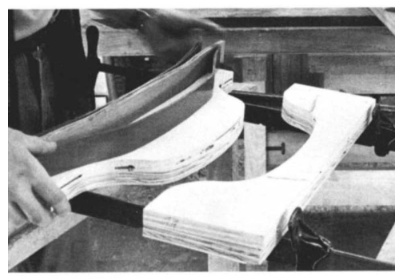
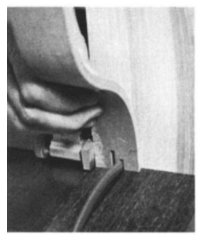
When each side are glued and dry, clamp the wooden to the convex half of the shape, clear off the glue with an outdated rasp, and use a clean airplane to stage one edge, as proven under. Flip it over so the completed edge rests flat on the bench and rasp and airplane away no matter sticks up above the shape to achieve completed width.
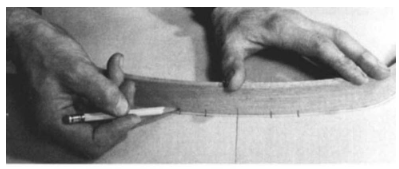
Now fastidiously mark off and lower the perimeters to size. The tray backside is held within the sides by 4 tabs in mortises, and the mortises are a bit wider inside than exterior. One mortise on either side must be pared at meeting so as to snap the underside into place. The simplest technique to lay them out is to put the aspect items on the store drawing and switch the marks, on each the within and outdoors, and sq. them throughout the wooden. The width of the mortise is laid out with a double-pin marking gauge, or a single one set twice; verify the thickness of your plywood as a result of industrial inventory is famous for being solely roughly 1/4 in. thick. The tabs should match tightly.
 |
 |
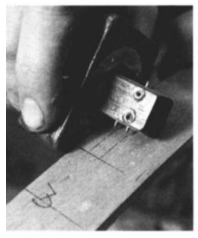
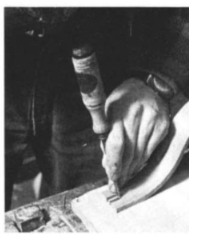
I used an eggbeater drill with a twist bit to take out the waste, beginning with the 2 finish holes after which those in between. Use a bit a bit smaller than the tab thickness as a result of the holes could wander and it’s straightforward to wash as much as dimension with rattail and straight information. Put masking tape on the again earlier than drilling—it’s going to decrease splitting. This joint is a by means of mortise and tenon, and I made the ends of the tenon flush with the outer floor and sanded all the perimeters barely spherical. There are variations. The mortise may very well be squared off as an alternative of being left spherical from the drilling, or the plywood tabs may very well be additional lengthy and pinned with a tiny wedge to emphasise the joint. Or the tabs may very well be eradicated totally by becoming the underside right into a shallow groove lower throughout the perimeters with a scratch-stock.
 |
 |
The opposite joints to be lower in either side are the slots for the handles. I made them 3/8 in. extensive and three/4 in. deep, chopping the perimeters with the piece held vertically on the desk noticed after which chopping the ends with a chisel. Then I used a small spokeshave to spherical the highest and backside edges of the aspect items to a radius of about 1/8 in. It’s best to place a radius on an edge like this, to accommodate put on.
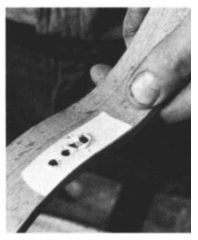
I lower the matching dadoes within the handles (backside photograph) whereas the inventory was nonetheless sq., taking care to get a great match as there may be not a lot space for long-grain gluing. Then I rasped the handles barely concave to provide a greater really feel to the hand.
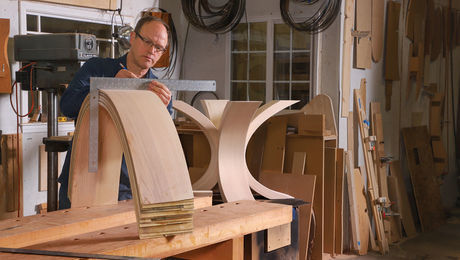
The subsequent step is to put out and lower the plywood panel. The best way to take care of variations within the aspect curves is to suit the perimeters and handles collectively. Place the meeting on the plywood, and thoroughly hint round each the within and outdoors. The plywood piece is eighteen in. lengthy and the arc on every finish is swung from a middle 11 in. away. Because the tray is sufficiently small to be simply picked up, each the highest and backside must be sanded and completed fastidiously. Begin with 80-grit on the plywood and 50-grit on the strong components, and sand by means of 120-grit and 220-grit on all surfaces.
The plywood backside must be completed with lacquer or polyurethane to withstand food and drinks, and the perimeters and handles with oil to withstand knocks and chips. I’d advocate placing masking tape on the tenons and ending the plywood earlier than meeting and rubbing on the oil after meeting. If you happen to put lacquer or polyurethane on the perimeters and handles in addition to the underside, do it earlier than meeting. However masks all of the spots that must settle for glue.
Stop Springback in Bent Laminations
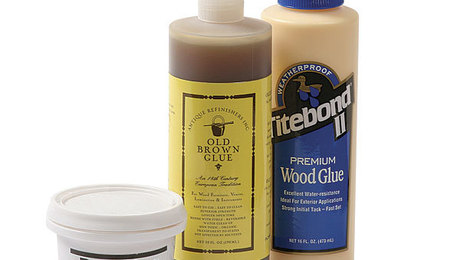
Safer Glues for Veneer and Bent Laminations
Learn how to Create Curves with Bent Lamination
Join eletters immediately and get the newest strategies and how-to from Advantageous Woodworking, plus particular provides.