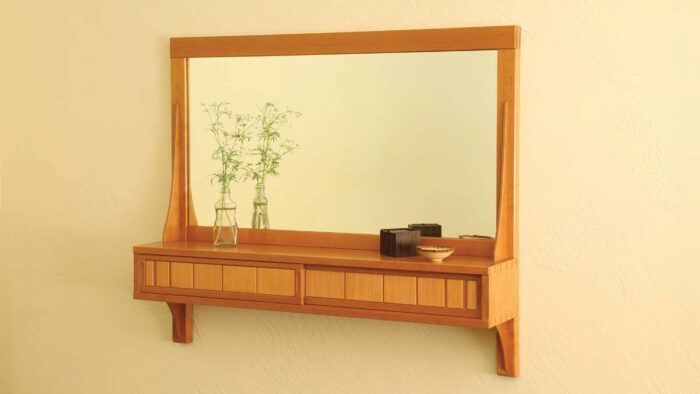
It’s frequent for an entryway mirror to be accompanied by a small desk beneath it to gather keys, wallets, and telephones. This piece combines the 2 to take up much less area and preserve the ground clear. Hold the mirror low and add a chair and it turns into a compact bed room vainness. The utility of the design veils the unique motivation for constructing it, as a chance to experiment with geometrically fascinating door panels. The small panels could be made out of cutoffs. They are often strong wooden or veneer, pierced with holes or carvings. Consider them as a clean canvas to fill after finishing the simple conventional joinery of the challenge.
Begin with the field
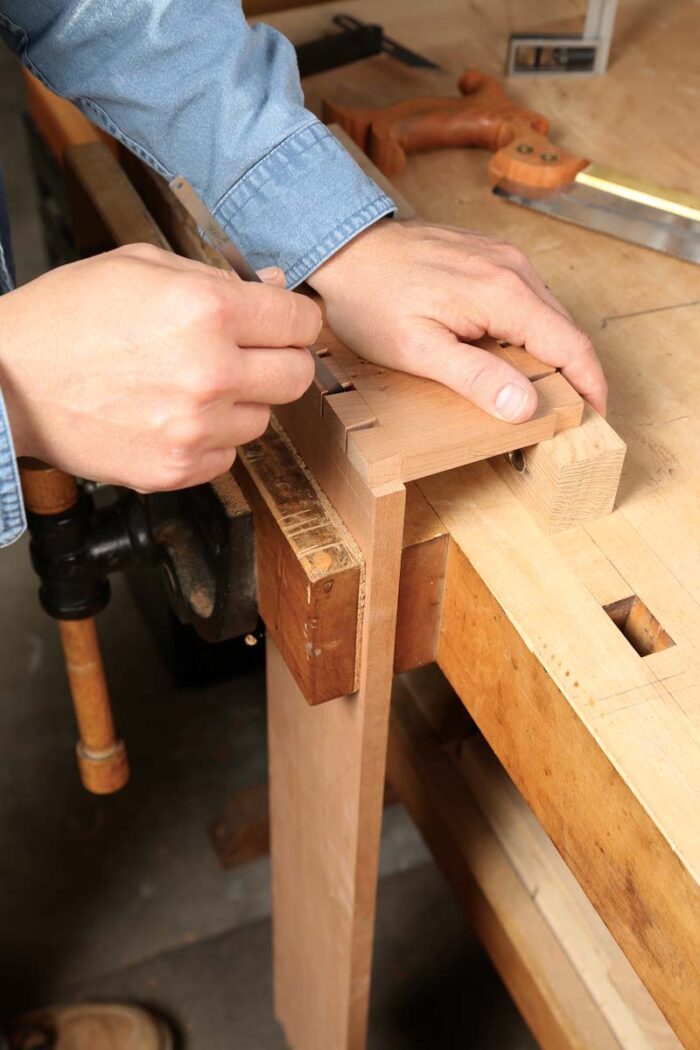
Mark out a delightful dovetail sample, and minimize the tails within the sides. Switch that structure to the highest and backside, and minimize the pins. On the router desk, rout grooves within the prime and backside for the sliding doorways. Keep in mind to make the underside groove shallower than the highest groove. Rout a rabbet at the back of the field to simply accept the frame-and-panel again.
|
|
|
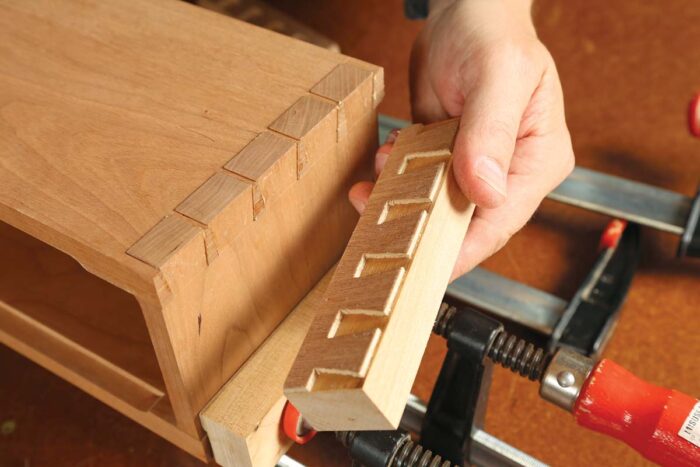
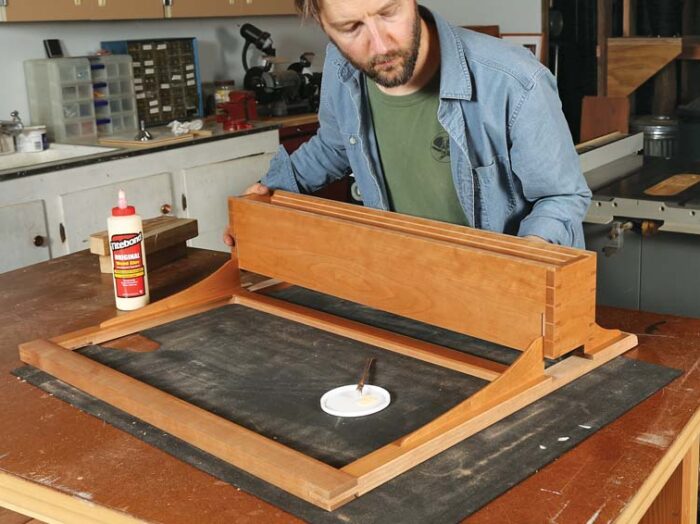
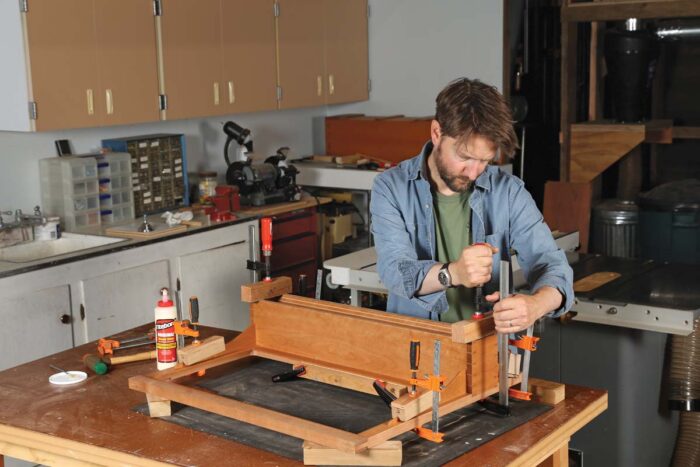
Glue up the carcase
 |
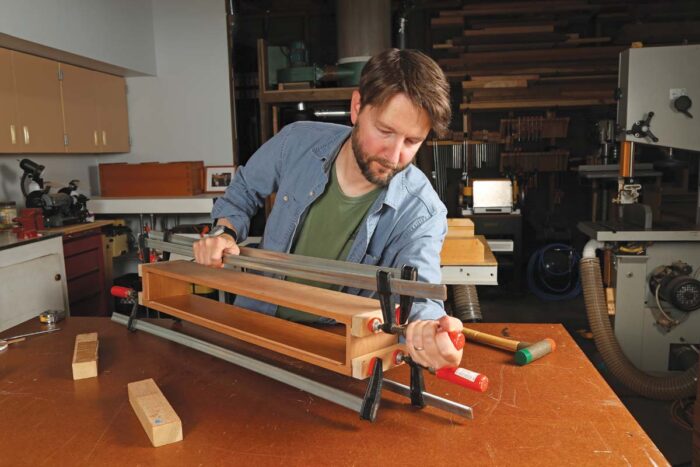 |
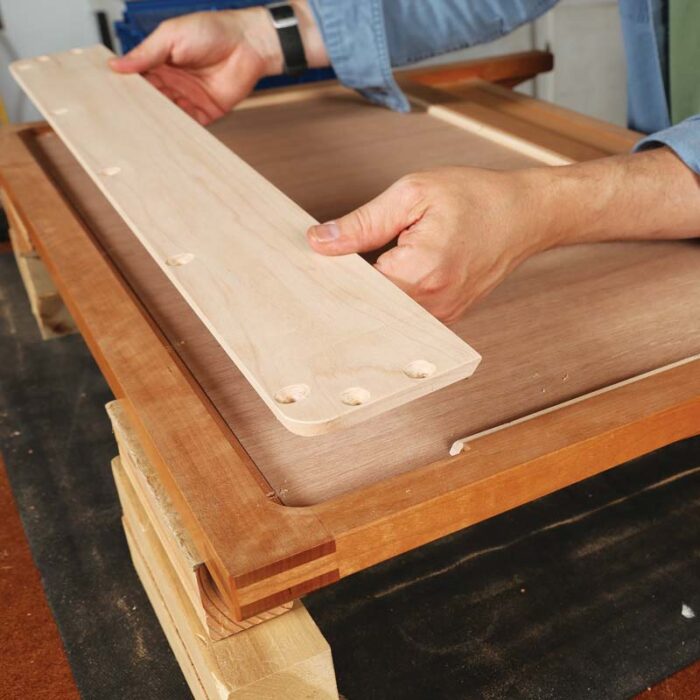
After pre-finishing the inside, glue the perimeters to the highest and backside. A caul with a skinny copy of the tail structure utilized to it lets you exert stress on the dovetails with out interfering with their match. Wax the caul to keep away from gluing it to the case.
Again body and panel
Measure the rabbeted opening at the back of the finished field and mill the again panel rails and stiles to dimension. On the desk noticed, minimize the bridle joints within the body components and rout a groove to simply accept the panel.
The panel materials and graphics are as much as you, however make sure to observe the principles of wooden motion. The panel can match the carcase materials, which helps it fade into the background, or it might complement the door panels.
On the router desk, increase the panel. Then dry-fit the body and panel. When assembled, it must be about 1⁄32 in. longer and wider than the rabbeted opening. Pre-finish the again panel and the interiors of the body members and glue it up. Then clear up the joinery, sand, and end the body. Match the again to its opening with a hand aircraft and glue it in place. Aircraft the again panel flush with the again of the field. Chamfer the sides of the field, sand to 320 grit, and end the outside with shellac.
Mirror body has two kinds of joinery
Sort out the body’s bridle joints first. The bridle tenons are centered within the stiles, however as a result of the highest rail is thicker than the stile, the bridle mortise in it’s offset. To chop the bridles within the prime rail, first mark out the bridle tenons on the stiles and switch these marks to the rail. You’ll want to reference off the again of all items. With bridle joints, chopping take a look at items is crucial. When you’ve dialed within the take a look at match, chopping the joints is easy.
 |
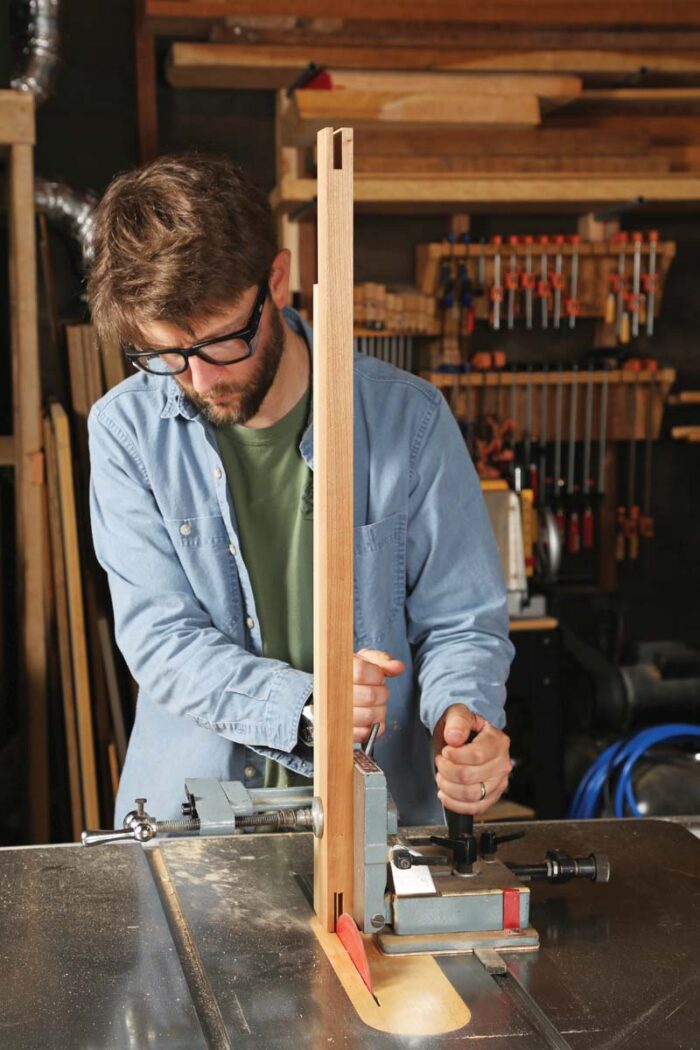 |
The bridle tenon is centered within the stile (drawing above left). However as a result of the highest rail is thicker than the stile, the bridle slot in it’s offset. Referencing off the again of the items, first lay out the tenon on the stile, then switch that structure to the rail. Sterns makes use of a tenoning jig on the desk noticed and a number of passes to chop the bridle slot (above center).
After chopping the cheeks on the desk noticed (prime left), take the stiles to the bandsaw and noticed off the waste, chopping near the shoulder line (prime proper). Head again to the desk noticed and minimize all of the shoulders (backside left). Lastly, again on the bandsaw, trim the tenons to width, being cautious to not overcut into the shoulders (backside proper).
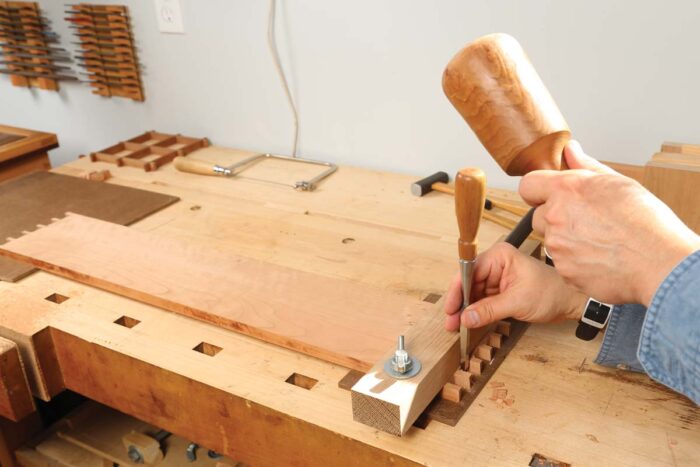
Subsequent minimize the mortises within the stiles for the underside rail tenons. I take advantage of a router and a mortising field, a technique I borrowed from “Fast and Correct Mortises” by Bob Van Dyke. Then, on the desk noticed, minimize the tenons on the underside rail. Chamfer the sides, sand, and pre-finish the inside surfaces.
Fast and Correct Mortises
When you’ve ready all of the components, glue up the mirror body. When the glue is dry, rout a rabbet deep sufficient to match the thickness of the mirror, the backing plywood, and the French cleat. It ought to go away a minimum of a 1⁄8-in. lip on the entrance of the body. Chisel the corners of the rabbet sq.. Subsequent, rout away materials for the ends and the highest fringe of the French cleat, which lengthen past the mirror to permit area for screws. Rout this second rabbet deep sufficient in order that after the mirror is put in the cleat will lie flat on the plywood backer. Depart the highest corners of the French cleat rabbet spherical, to keep away from eradicating an excessive amount of of the bridle joints. Clear up the joints and chamfer the highest and ends of the highest rail.
Dadoes and grooves
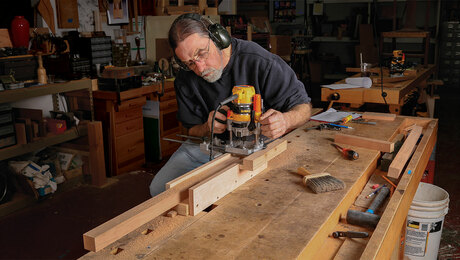
There’s extra to be achieved on the mirror body: Rout dadoes to simply accept the field and grooves to simply accept the corbels.
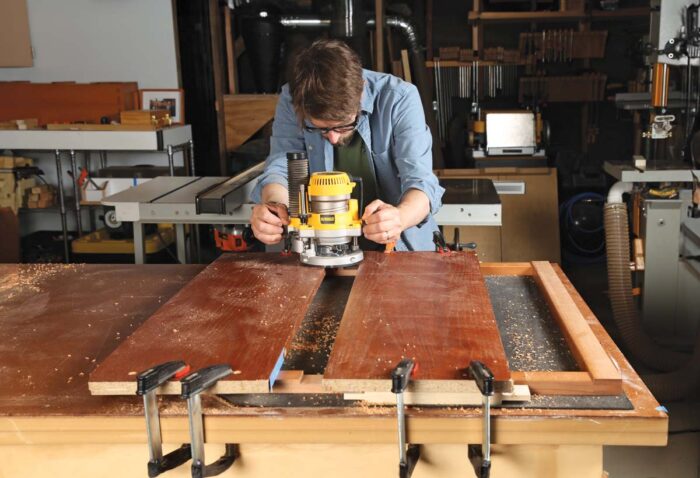
I minimize the dadoes by establishing fences on both sides and using the router towards the fences. To make sure the router is totally supported, I minimize half the dado after which transfer the fence and minimize the opposite half.
 |
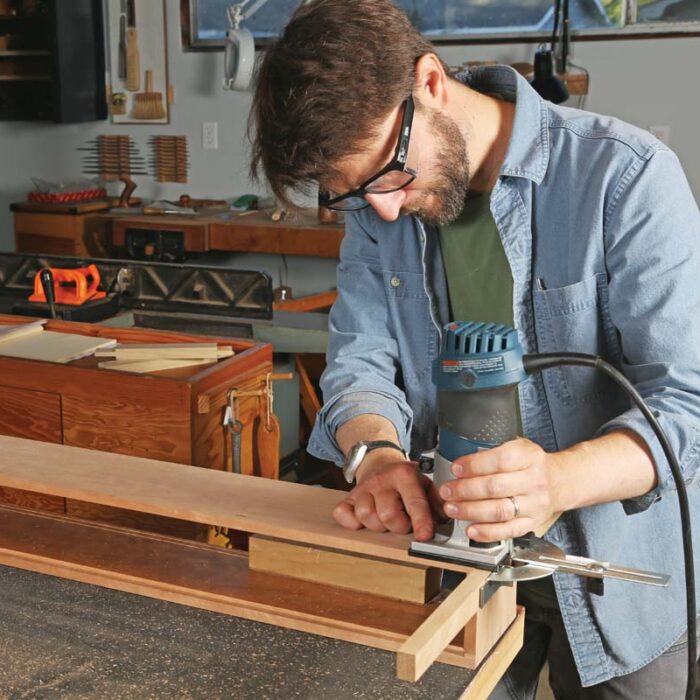 |
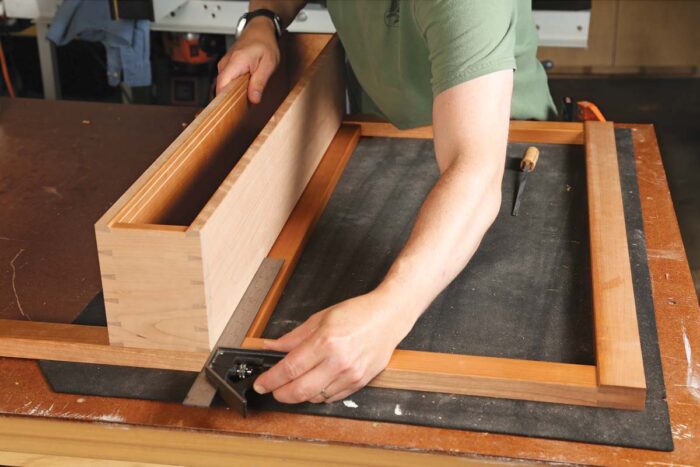
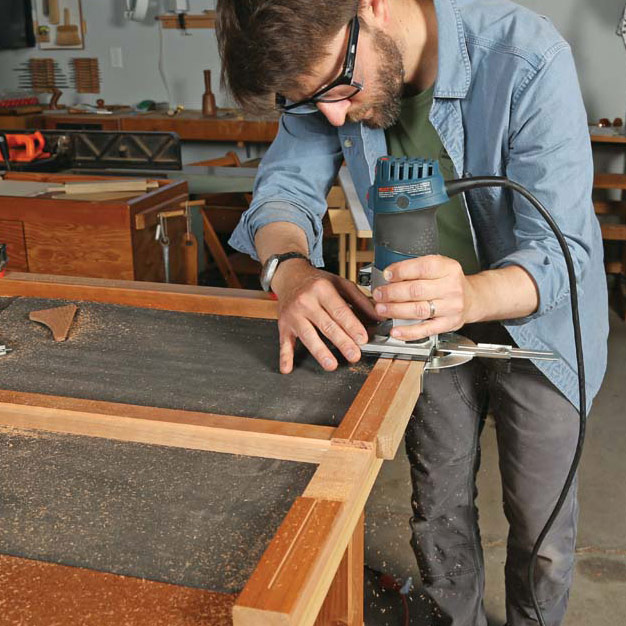
Subsequent, use a router and fence to chop grooves down the middle of the stiles to accommodate the corbels (above left). Match the field into the dado within the actual place the place will probably be glued, and switch the corbel grooves to the highest and backside of the field with a knife. Modify your router fence and minimize the corresponding grooves (above proper).
 |
 |
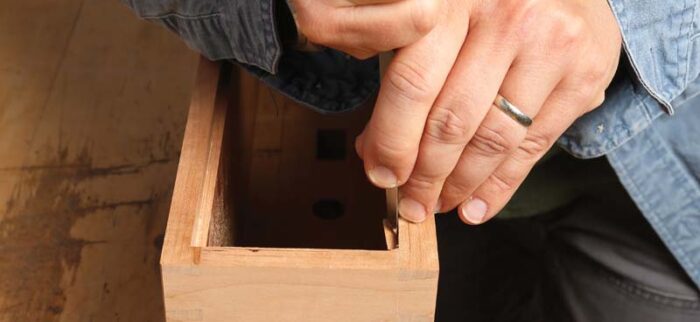
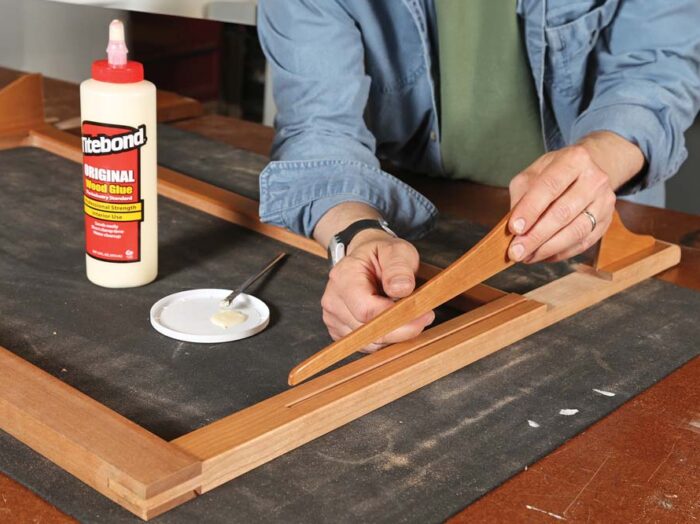
Form, sand, and end the corbels. They have to match gap-free within the grooves and match to the body and field grooves on the identical time. It is going to in all probability take a number of tries at dry-fitting every one earlier than they match properly. The field and corbels are hooked up to the mirror body in a single glue-up. Glue within the corbels first, then slide within the field and faucet it residence.
As soon as the meeting is full and every part is cleaned up, the mirror could be put in.
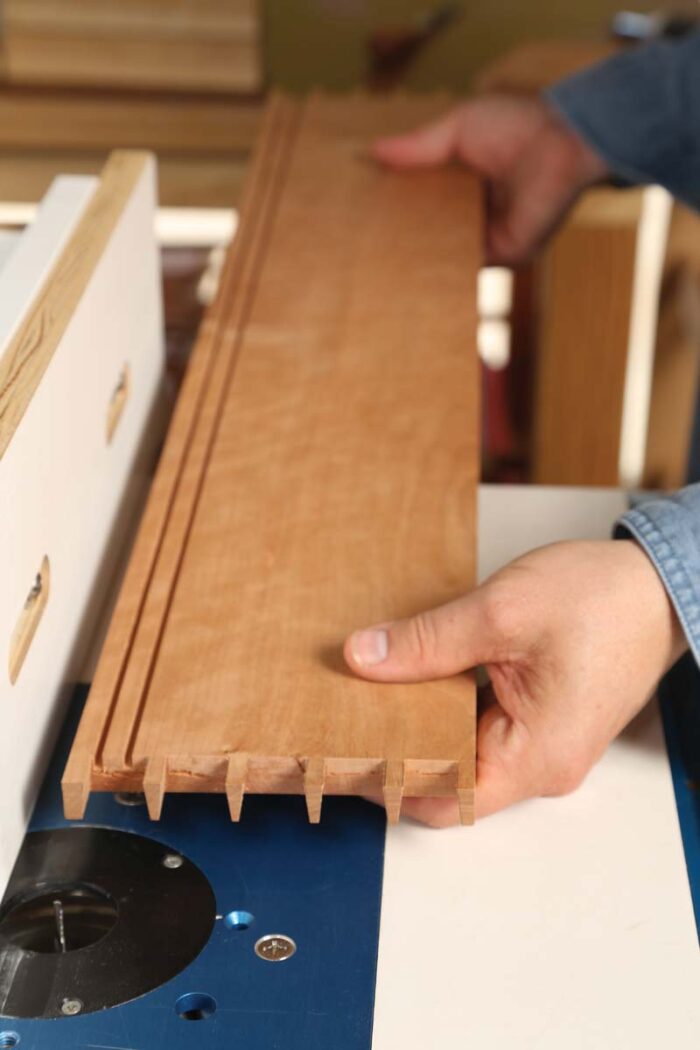
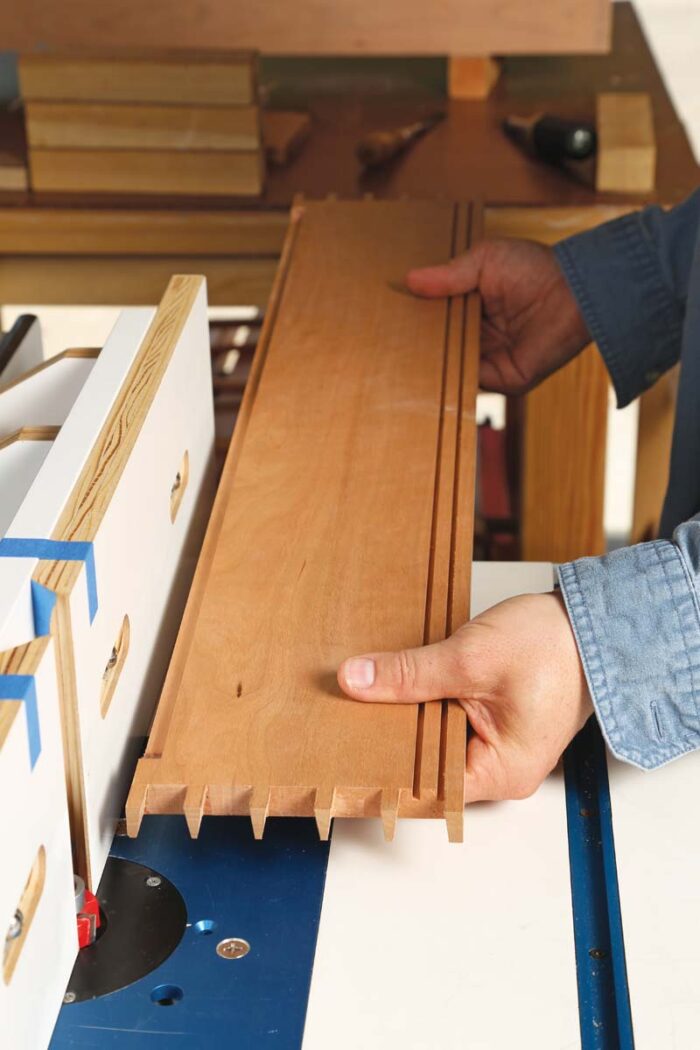
Sliding doorways
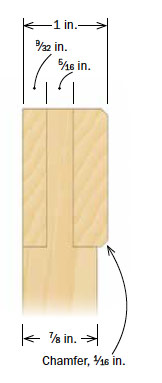
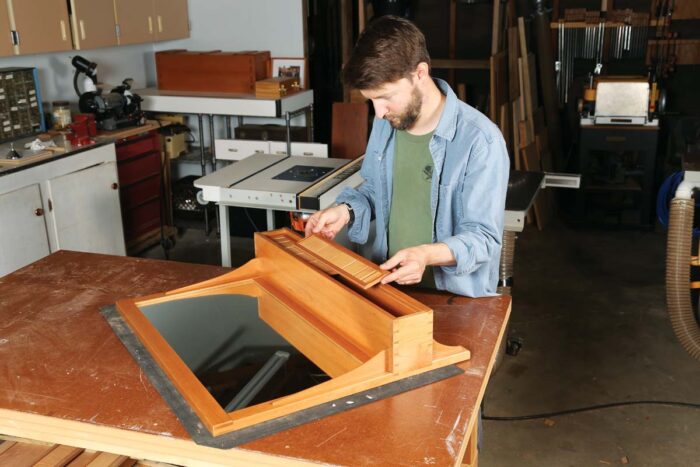
The doorways elevate out and in of the grooves within the field, and so they should slide simply with out rattling round. I make the doorways run on the underside of the groove, fairly than having the shoulder on the backside of the door run on the floor of the field. This lets you match the gaps on the underside and prime of the doorways, and keep away from the door chopping a visual groove into the field through the years.
Mill the door body members to last dimension. I set the width in order that when the doorways are closed the stiles within the middle overlap by the width of the stile. When figuring out the peak of the doorways, take the highest and backside tongues into consideration. Lower the bridle joints on the desk noticed, after which rout a groove on the within fringe of all door members to simply accept the panel. Sand and pre-finish the
inside edges of the door components.
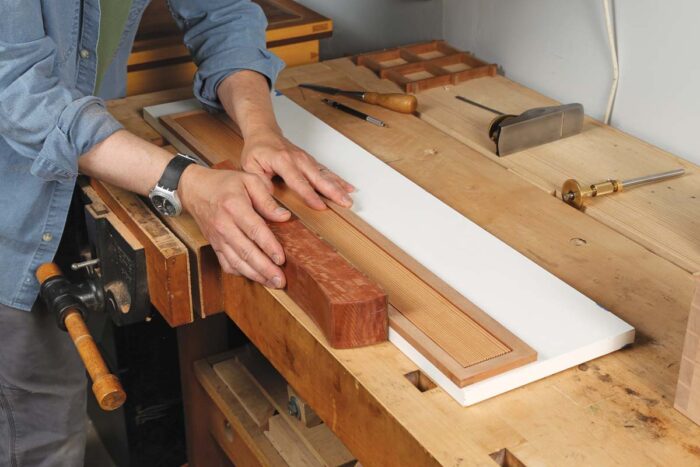
Now lay out and minimize the person panel items. For the lengthy horizontal panels I performed with the thought of separated vertical items that go from narrower to wider and again once more. On the desk noticed, minimize slots within the edges of the items to simply accept splines.
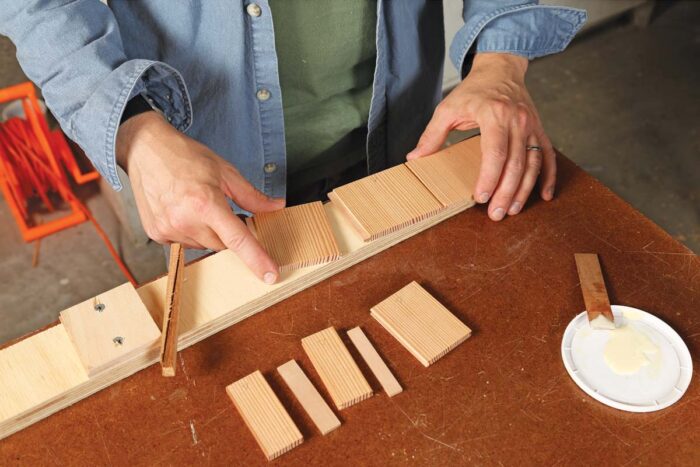
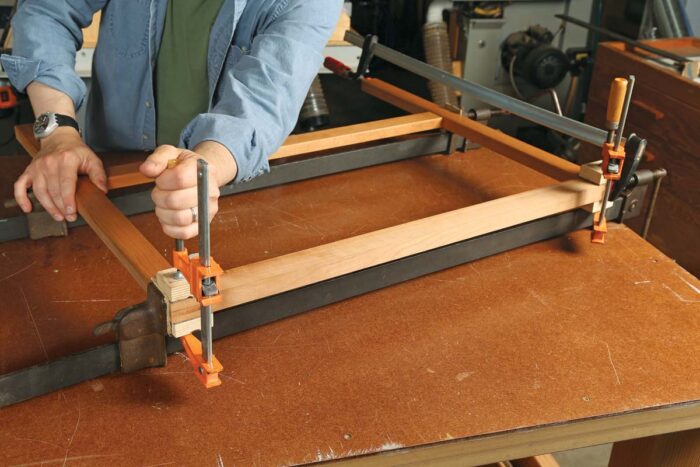
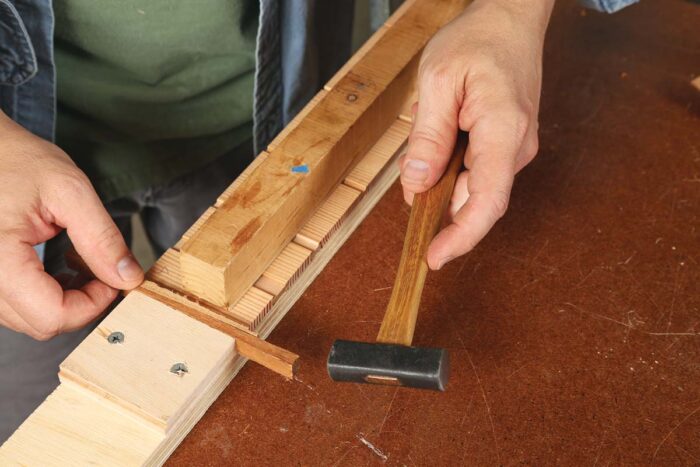
To simplify assembling the various small panel components and splines into one broad panel, do the glue-up on a chunk of plywood lengthy sufficient to accommodate all of the items plus a cease block, two opposing wedges, and just a little additional area for the wedges to do their magic.
Clamp one finish. As you apply glue, assemble all of the panel components and splines on the jig with the 2 opposing wedges towards the cease block (however not but tightened). Set a caul throughout the width of the items, and apply clamp stress on the finish of the caul farthest from the cease block.
 |
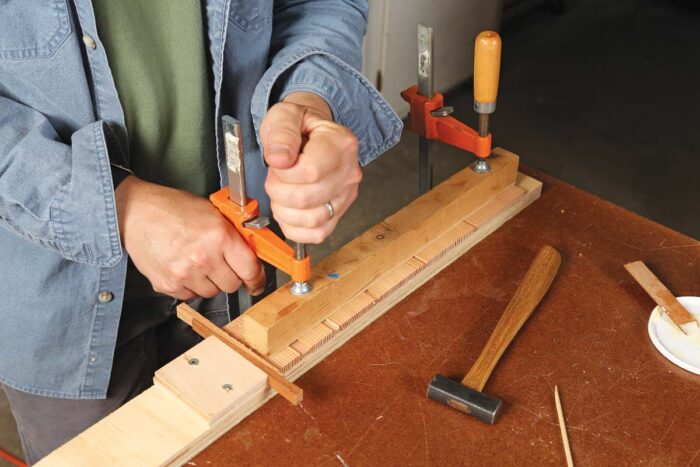 |
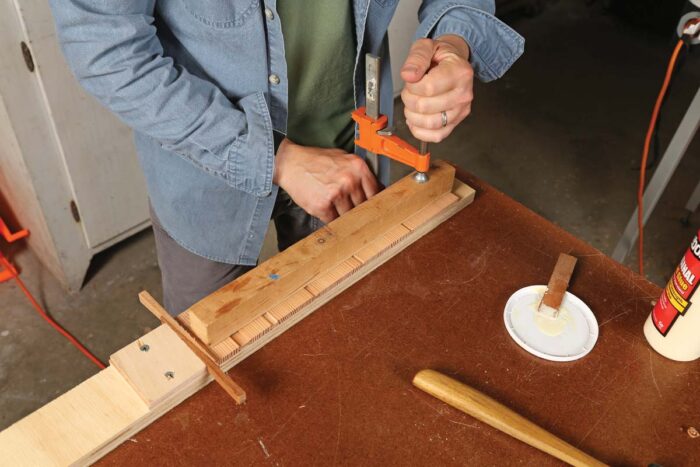
Have interaction the wedges. Faucet the wedges towards one another (left), filling up the additional area between them and the panel items. This pushes all of the stress towards the clamped finish. As soon as the items are all tight to one another, clamp the opposite finish of the caul to maintain the items flat whereas they’re drying (proper).
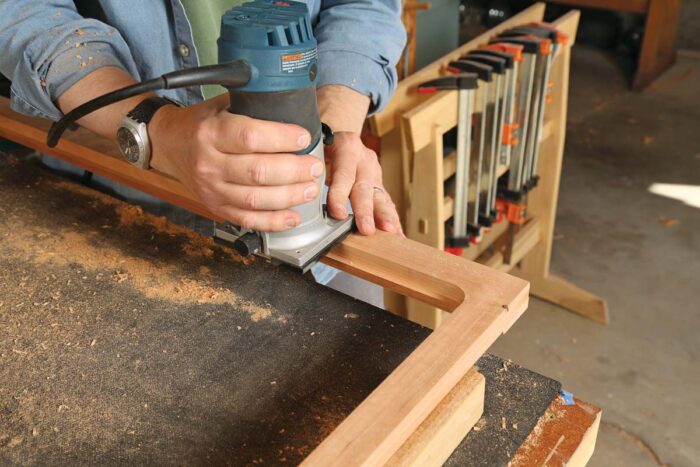
Glue the items collectively to create strong panels. Elevate the panels by routing a tongue to suit grooves minimize within the body members. To keep away from chipping out wooden that isn’t backed up (the place items are linked by splines), use a marking gauge or knife to chop the wooden fibers in these areas. Sand and pre-finish the panels, after which glue up the frame-and-panel doorways.
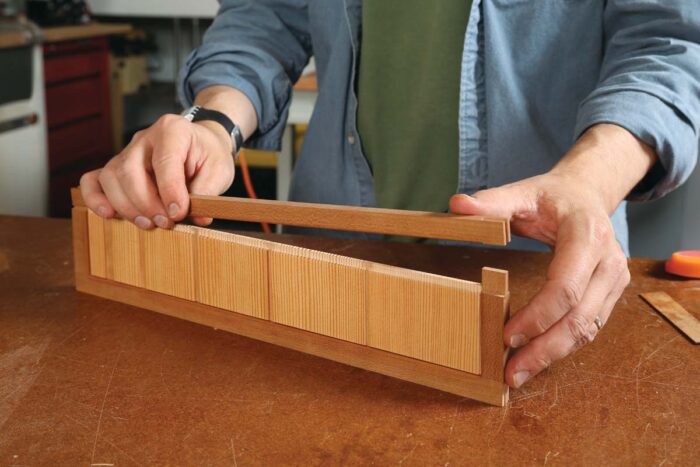
As soon as the glue is dry, clear up the joinery and minimize tongues on the tops and bottoms of the doorways to suit the field groove.
The pulls are indentations routed into the door stiles. I take advantage of a round-nose router bit to chop a groove on the router desk, then mix it with sandpaper.
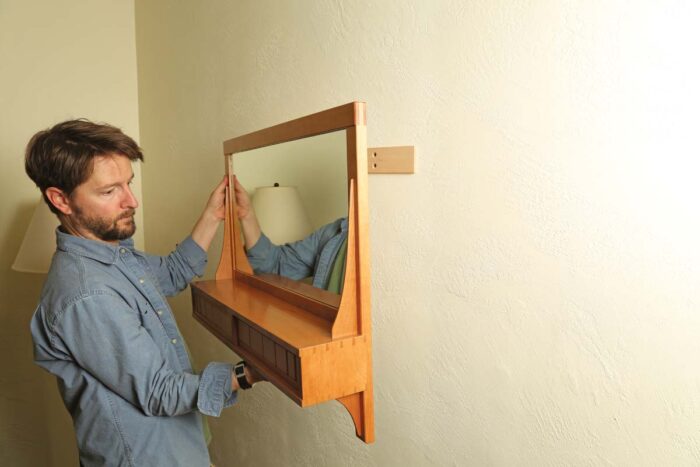
Set up the mirror and French cleat
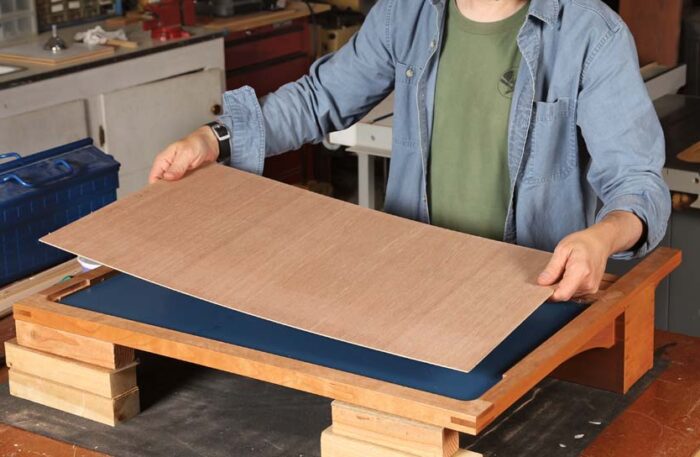
For something apart from a really small mirror, use 1⁄4-in.-thick glass. Too skinny, 1⁄8-in. glass flexes and distorts, and whereas 3⁄16-in. glass is usually accessible, it tends to be more durable to search out and costlier.
 |
 |
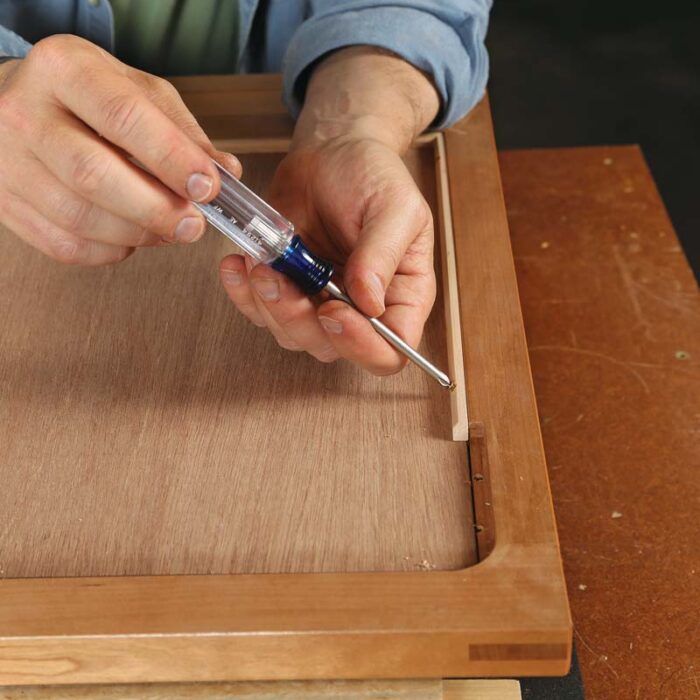
As soon as the mirror and plywood are in place, set up the stops and the French cleat. The cleat acts as a cease on the prime of the mirror, so stops are solely wanted on the perimeters and backside. Drill pilot holes and countersinks for all screws, ensuring the drilling angle is steep sufficient that the screws received’t contact the mirror. Safe the stops to the perimeters and backside, and connect the cleat to the highest. When put in, the French cleat must be flush with the again of the body, so its actual thickness is set by the rabbet that has been routed for it. I take advantage of exhausting maple for French cleats because it’s available and robust, however many different hardwoods, resembling oak, would additionally work.
To make the interlocking two-part French cleat, mill a chunk of wooden to actual thickness however twice its last width. Then rip it in half on the desk noticed with the blade tilted to 45°. Set up the cleat with screws.
Mill the cease strips concurrently the French cleat as they would be the identical thickness. Rip them to a sq. profile, then chamfer one edge to simply accept screws. Nails are extra conventional for attaching stops, however I like screws for the convenience of removing if needed. Lower stops to size and set up.
—Joshua Sterns designs and makes furnishings in Fort Bragg, Calif.
To view all the article, please click on the View PDF button beneath.
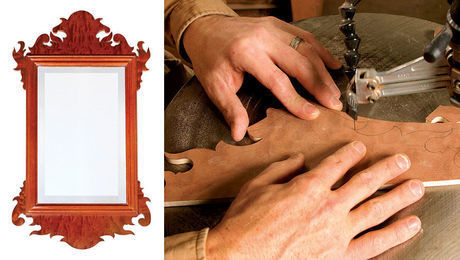
Construct a Chippendale Mirror
Designer’s Pocket book: The Passage of Time
Fast and Correct Mortises
Join eletters in the present day and get the most recent methods and how-to from Advantageous Woodworking, plus particular presents.
Obtain FREE PDF
whenever you enter your e-mail tackle beneath.
View PDF